Wednesday 29 April 2015

Rice Salad

Rice Salad

As this meal is not really known in Austria, I thought I could share with you a recipe I love to use in the summer months. The rice salad is a quite refreshing, healthy and tasty meal you can prepare in 15 minutes. This salad is excellent on its own and also perfectly fits for a barbecue side-dish! ;)

Ingredients
  •           Rice (as much as you want), knowing that 1 cup + 2 cup water ≈ 2 people
  • -         Tomatoes (idem)
  •           Corn (idem)
  •           Lettuce (idem)
  • -         Olives (idem)
  •           1 or 2 tuna can(s) (optional: my mother uses this but I don’t)
  •        In fact, everything you like to put in it like maybe prawn, ham, cheese, carrots, peppers, onions, garlic, nuts, etc.


My personal salad-dressing

  •           1/2 teaspoon(s) of hot Dijon mustard
  •           Wine vinegar
  •           Olive oil
  • -         Pepper, salt
  •           Herbs (I use the Provence herbs but you can use what ever you want)


Preparation

  1.           Cook the rice as if you were cooking pasta (that’s important because your cooked rice shouldn’t be sticky).
  2.           While the rice is cooking cut the tomatoes in cubes, cut the lettuce and put it and the other ingredients into a big bowl.
  3.           Once the rice is done, drain it using a colander. Cool the rice off using cold water and when the rice has become cool, add it to the other ingredients.
  4.           In order to prepare you dressing, just put all the ingredients together and stir your preparation until it becomes a unified color.
  5.           Pour your dressing into the salad and mix everything together and…
... your rice salad is ready to eat! J


I speak food!


Marbled Guglhupf
Guglhupf is one of the most popular Austrian desserts, and a classic for afternoon teas and Sunday breakfasts. When I was a kid, I loved to bake cakes with my mom. I have a lot of fond memories with her baking different desserts. Guglhupf is actually the first cake that we made together when I was six. The cake is really easy to make, which was probably the reason why mom allowed me to help her. I regularly bake the dessert, because it’s not one of those creamy calorie bombs and fits perfectly with afternoon coffee and tea.

What you need:

250 gr flour
250 gr  icing sugar
250 gr  butter
5 eggs
1 pack vanilla sugar
1 pack baking powder
7 table spoons of milk
2 to 3 tablespoons of cocoa powder
20 ml rum

How it’s done:
  • Separate egg yolks from egg whites and whisk the egg whites until stiff.
  • Whisk the butter, the icing sugar, the vanilla sugar and the five egg yolks until frothy.
  • Add the flour, baking powder, milk and rum and mix well.
  • Carefully stir in the beaten egg white.
  • Coat the Guglhupf form with butter and flour.
  • Pre-heat the oven to 180 degrees Celsius.
  • Fill half of the dough into the baking form.
  • Mix the cocoa powder into the remaining dough and add the dough to the form.
  • Bake the cake for approximately 40 to 60 minutes. (After 35 minutes, pierce the dough with a fork to check whether it is done. If the dough sticks to the fork, the cake needs to bake a little more.
  • Allow some time to let the cake cool out in the form before turning it out.
  • sprinkle it with icing sugar, using a small sieve or tea strainer.
Variations of the classic recipe
There are about as many variations of the classic Guglhupf recipe as the year has days. Essentially, they include a few extra table spoons of either chopped nuts; nougat creme; blueberries and yoghurt; ground almonds and bitter orange oil; or cold mulled wine, to name just a few. You can also pour chocolate sauce or a thin layer of icing on top, instead of the icing sugar.


Roman eating habits

Hello everybody,
In my second blog post I’d like to talk about culture-bound misunderstandings concerning food. Who would’ve expected any of them to happen in Italy, the paradise for food lovers? On my trip to the amazing capital city during the Easter Break I had to find out that there was still a lot about Italian eating habits that I hadn’t heard of before.

Who cares about breakfast?
The first problems already came up when we were looking for breakfast. We were staying in a very nice B&B and since the word ‘breakfast’ is mentioned in the name we’d of course expected to get a filling breakfast there. Well, they offered breakfast, but because it only consisted of a Croissant and coffee, we decided to look elsewhere. The B&B was located in the center of the city in an area with many little, charming cafes and bakeries. After having looked for paninis or any other kind of bread in almost all of them without any success, we had to accept the fact that it is simply not common in Italy to have a proper breakfast. You could see people everywhere in cafes standing at the counter sipping their ‘espressi’. The only food some of them would have to go with the coffee was a croissant.
I’m not the kind of person for whom a croissant is a filling breakfast. Anyway, the ones you get in Rome are heavenly. I’d never noticed that this type of pastry was so popular among Italians. You can get them in all variations. The ones I liked best were those with pistachio filling. Even at McCafe offers at least five different types.


Red or white?
Not only the search for breakfast but also getting dinner sometimes was challenging for us. The first problem we had was that at the time we started looking for a nice restaurants where we could get the pizza and pasta we’d been waiting for, all of them were still closed. Well, that’s something we could’ve known. Unlike Austrians Italians simply don’t eat dinner before 9 o’clock.
Once we were sitting in a restaurant, ordering wine and starters went surprisingly well. Also when I ordered my pizza Frutti di Mare I thought there could be nothing wrong about my order. I was a bit disappointed when I got it because the only seafood on it were a few shrimps. Well, no reason to complain. Only when I took the first bites of my dish I thought it didn’t really taste like a pizza. It didn’t look like one either. It was too light. Then I realized that the chef must’ve forgotten to put tomato sauce on it! Since I’m not a person who likes sending back dishes, especially not in a foreign country because you can never be sure about local eating habits, I continued with my bread and cheese. When the waiter came to clear away the plates I asked him whether the tomato sauce had been forgotten. He burst out laughing and told us that you don’t get a pizza with tomato sauce unless you order a ‘red pizza’. Otherwise you get it ‘white’, the way my pizza looked like.


These were only two examples for a lot of facts that surprised me about Italian eating habits. Anyway, Italy is a country where you just can’t stay hungry.

An International Cuisine Dinner


As we were recommended to make our experience for the food blog as fun as possible, we decided to do this work as a group of four and have an international cuisine dinner. Each course we had came from another country which turned out to be an interesting idea. Why is there so much garlic in the Greek Tzatziki? Who would ever make handmade puff pastry except for Alma’s mum? All in all, we sure had a lot of fun and full bellies afterwards.

Starter: Tzatziki (Marlene)
20150426_181155.jpg

Tzatziki is fairly easy to make. All you need is (no, not love…) yoghurt, cucumber, garlic, lemon, salt and pepper. You can add a dash of olive oil or some herbs like chives or dill for extra flavour, if you like, but those are the most important ingredients. How much of each ingredient you need depends on your personal taste and on how much Tzatziki you want to make. For mine I used…
  • 1 cup (500 g) of plain yoghurt
  • half a cucumber
  • 2 cloves of garlic
  • roughly 1 teaspoon of fresh lemon juice
...and then I seasoned it with salt and pepper until I deemed it tasty enough.
First, I poured the yoghurt into a bowl. I then added salt, pepper, and a splash of lemon juice to refine its taste.
My next step was to add the garlic to the mixture. I recommend you use a garlic crusher for that, but since I don't have one, I just used a knife to cut two cloves of garlic into tiny little pieces. I tried to make them as fine as possible, so there wouldn't be any garlic chunks. The thing with garlic is that the intensity of its taste can vary a lot. I was originally told to add 5 cloves to the Tzatziki by a reliable source (aka my mum). I added two and it was already verging on too much. So I suggest you just taste the yoghurt-mixture after every clove you add to make sure you don't end up having made Tzatziki that's either tasteless or far too garlic-y.
After I'd added the garlic, I chopped half a cucumber up into small squares, whisked them together with the rest, and just like that my Tzatziki was finished. Took me a grand total of about 15 minutes max. So if you ever need a quick and simple side dish or starter, Tzatziki is the way to go! Just... Be careful with the garlic... Less really is more sometimes, I learned that the hard way...

Main Course: Cheese Pita (Alma)
20150426_182713.jpg

Pita is a traditional Bosnian dish, best served fresh from the oven. Pita is light, healthy and easy to make. Depending on what type of pita you prefer, it can be a gateway drug to moreish and healthy eating. If you don’t insist on making the pastry yourself, it can be referred to fast food as well.
What you need:

  • flaky/puff pastry
  • natural yoghurt
  • eggs, yolk
  • salt
  • pepper
  • feta cheese
Mostly, there are no measurements needed when cooking this, because it is a rather long lasting dish and therefore you can make as much as you want to.
At first you have to take the yoghurt, eggs, yolk, spices and the crumbled feta and mix everything together until you have a thick mixture. After that you roll the flaky pastry into a long and thin dough. Then you place the mixture alongside two opposing edges of the pastry. When this is done, you have to roll it over so the filling is fully surrounded by the pastry. Then you have to grease the baking plate and put the pita in the oven for about 45 minutes at 200°C. The last step before taking it out of the oven is to pour melted butter over it to intensify its taste. This amazingly tasty dish is best served with yoghurt and tomato salad. While eating with cutlery is considered as boring, Bosnians declare it as finger food. You may or may not wash your hands afterwards.
Pita can also contain other fillings such as: potatoes, zucchini, spinach and meat.
I would, of course, add the original names of them, but they are unspeakable for those who don’t speak any of the slavic languages.


Dessert No. 1: Mousse au  chocolat (Ines)
20150426_185452.jpg
There is no dessert more typically French than mousse au chocolat: It’s a bit too much of everything and still manages to stay classy. Every look at it seems to gain you a tiny piece of fat on your hips while every spoon of it makes you crave for more. That’s probably the kind of food they invented the adjective ‘moreish’ for.
Many people do not seem to realise how fast you can make such a mouth-watering dessert. Of course I’m not French, but I tried my best to create the impression that I know how mousse au chocolat is supposed to taste.  All you need is three eggs, about 250 grams of cream, 200 grams of chocolate and some sugar. I usually add between 20 and 40 grams. Depending on your personal preferences, you can either use milk chocolate, which makes the mousse more sweet and tender, or dark chocolate to make it taste more interesting. For at least half of the chocolate mass, I would just use plain chocolate as it’s much cheaper and tastes superb as well.
Basically you just have to whisk the egg whites until it becomes a solid but fluffy white mass. Whisk the egg yolks with the sugar. Do the same with the cream while you heat the chocolate. If you do it in the microwave make sure you don’t burn the chocolate. That has happened to me so many times before. Now slowly and carefully mix the liquid chocolate with the egg yolks. Then let the whipped cream and the egg-yolk-chocolate-mixture unite. As a very last step gently fold in the whisked egg whites. Then put the whole thing into the fridge for at least three hours. If you want it to look really nice when you serve it, I’d recommend at least five hours. Well, I didn’t have that time, so this is why it was still a bit too creamy when we ate it. We enjoyed our mousse with a strawberry on top so that we could convince ourselves that there were vitamins in the dessert.


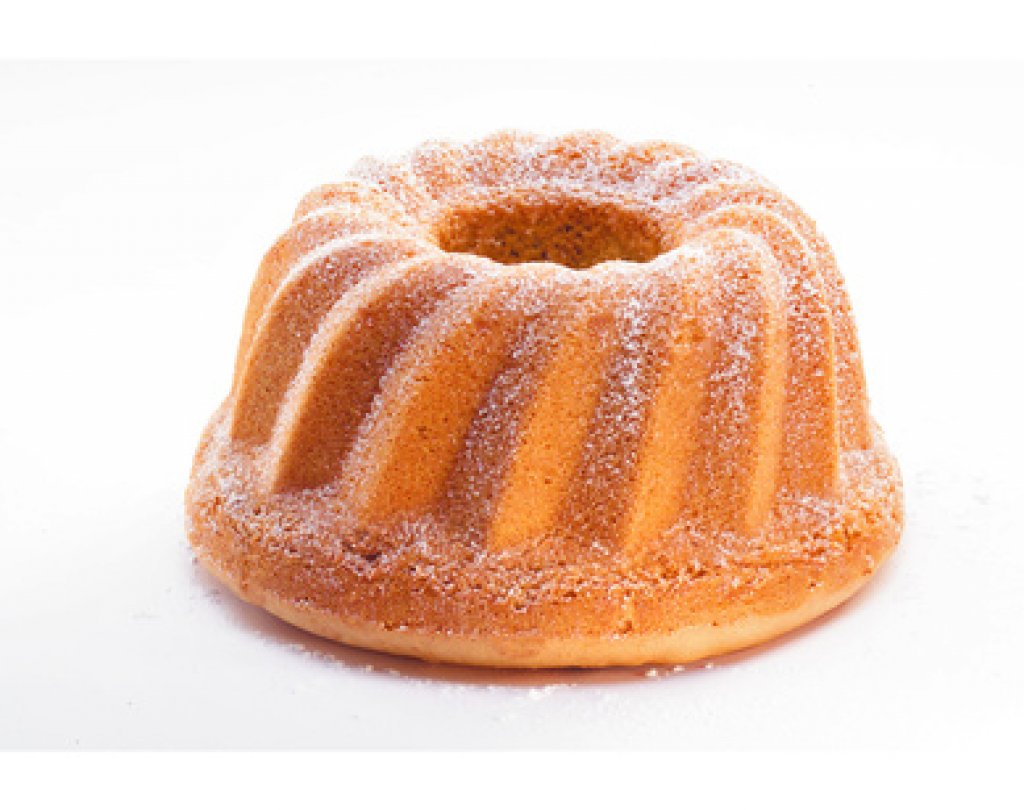
Dessert No. 2: Mor Monsen’s Kaker (Norwegian) = Mother Monsen’s Cake  (Tabitha)
IMG-20150427-WA0012.jpg
I decided on baking something for our dinner, because my cooking skills are very poor and I am better at baking cakes and cookies than cooking. My baking skills are not that good either, though, so I had to not only look  for a cake from a foreign country, but also a cake that wouldn’t be too hard to bake.
After some research in my mother’s cookbooks, I finally stumbled across a Norwegian cake, which is typically made there during Christmas time. The Mother Monsen’s Cake. In Norwegian: Mor Monsen’s Kaker.
As the instructions did not seem to be very hard to follow, I decided to take up the challenge and just give it a try. No risk, no fun.
So, I got together all the ingredients:
IMAG2267.jpg

  • 400 grams of butter (O.O seriously? Yep, I double checked it)
  • 200 grams of sugar (This cake is a real calorie bomb)
  • 1 package of vanilla sugar
  • 4 eggs
  • 250 grams of flour
  • 1 teaspoon of baking powder
  • 100 grams of almond flakes
  • 100 grams of raisins
    IMAG2270.jpgIMAG2287.jpg
The first step is to stir the butter till creamy. This took a little while and my fingers got pretty greasy, while struggling with the blender. (I really am a beginner ;))
Then, with the butter being nice and creamy, slowly add the sugar, vanilla sugar and the eggs and blend everything together.
After, more or less, successfully doing that, stir in the baking powder and the flour.
And that’s the whole batter. Pretty easy, right?
The only thing left to do now is to spread the dough evenly on the baking tray and sprinkle it with the almond flakes and raisins.
Now a piece of advice: There are people who don’t like raisins, so it might be a good idea to leave a part without raisins. I did not do it and regretted that later.
Then bake it in the oven at about 150 – 170 degrees for 35- 40 minutes until it has a golden yellow color. Aaaaaaand done!
As I had never baked this cake before, I was really curious about how it would taste. It felt like a little experiment when I took my first bite, but luckily it tasted really good. Well, it has to. There are 400 grams of butter in there!!!!
So, if you ever need or want to bake an easy cake and brag about it, that is the right cake. But beware… it surely is a calorie bomb!


OUR RESUMÉ
After we'd eaten all that the general consensus was to never move again. Ever. All four of us had our stomachs filled to the brim. Turns out four courses are a lot of food... Still, we had a good time preparing and eating said four courses, and agreed that we’d really like to stuff ourselves with randomly chosen and haphazardly made international dishes again sometime soon!

I speak food


Hey guys!
Today I would like to share two recipes with you which I cooked with my mum on the weekend. The first one is a carrot-oatmeal soup and the second one is traditionally Turkish cooked green beans.  Both of them are not very hard to cook and it also doesn’t take a lot of time. Additionally, these dishes are very healthy. So, if you want to keep fit and eat healthy, why not try them out?

Let’s start with the soup.

Ingredients:
·         4 carrots
·         2-3 cups of oatmeal
·         1 soup cube
·         Water
·         Margarine

Directions:
1.       First, peel the carrots and grate them.
2.       Then take a pot and put in 2 tablespoons of margarine.
3.       After the margarine melted put in the grated carrots and stir-fry
        them.
4.       Put in the oatmeal and keep stirring.
5.       After 2-3 minutes add some water so that the carrot-oatmeal
       mixture is covered.
6.       When it’s hot dissolve the soup cube in it and let it simmer for about half an hour.


Now to the Turkish green beans:

Ingredients:
·         500g green beans
·         1 large onion
·         1 clove of garlic
·         Pinch of salt
·         1 tablespoon  of tomato or pepper paste
·         Water
·         Splash of olive oil
·         1 soup cube


Directions:
1.       First, peel and chop the onion.
2.       Clean the green beans and cut them into large pieces.
3.       Stir-fry them together with the onion in a pot in a splash of olive oil.
4.       Add one tablespoon of tomato or pepper paste, a pinch of
       salt and a crushed clove of garlic.
5.       After the green beans lightly change their colour pour water over it so that everything is covered.
6.       When it’s hot dissolve the soup cube in it and let it simmer until the green beans are soft.


If you try to cook them by yourself, enjoy your meal and I hope you like it! :)