Tuesday, 31 March 2015

Vanilla-Chocolate-Swiss roll


Hello everyone!
Even though I am not a very good cook, I enjoy baking. I usually don’t have much time and that is why I like to bake simple cakes that do not need a lot of effort. A few days ago my mother showed me a new recipe, which I wanted to try for this blog post.


For the Vanilla-Chocolate-Swiss roll you need the following ingredients:
ü 6 eggs
ü 180 grams sugar
ü 140 grams flour
ü Baking powder
ü 4 tablespoons oil
ü 1 tablespoon custard powder (vanilla)
ü 1 tablespoon custard powder (chocolate)
ü 20 grams cocoa powder
 
Some jam for the filling and powdered sugar for dusting
 
Instructions:
1.      Preheat the oven to 160°C and put greaseproof paper in the baking tray, making sure that the paper extends over the edges.
2.      Prepare the first mixture:
a.       Separate 3 eggs and beat the egg whites.
b.      Add 90 grams of sugar and the yolks, then mix it until it is creamy.  
c.       Sift 80 grams of flour and a pinch of baking powder in the mixture.
d.      Add 2 tablespoons of oil and the vanilla flavored custard powder.
3.      Prepare the second mixture:
a.       Follow the instructions 2a to 2c but use 60 grams of flour instead of 80 grams.
b.      Add 2 tablespoons of oil, the chocolate flavored custard powder and 20 grams of cocoa powder.
 
4.      Fill the two mixtures in piping bags with big, round nozzles and squeeze the mixtures in diagonal stripes on the baking tray so that a striped pattern is formed.
5.      Bake in the middle of the oven for 15 to 20 minutes.
6.      Take a clean tea towel, place it on the work surface and sprinkle with powdered sugar.
7.      When the cake is done, take it out of the oven and put it onto the sugared tea towel right away. Spread the jam over the cake and roll it up.
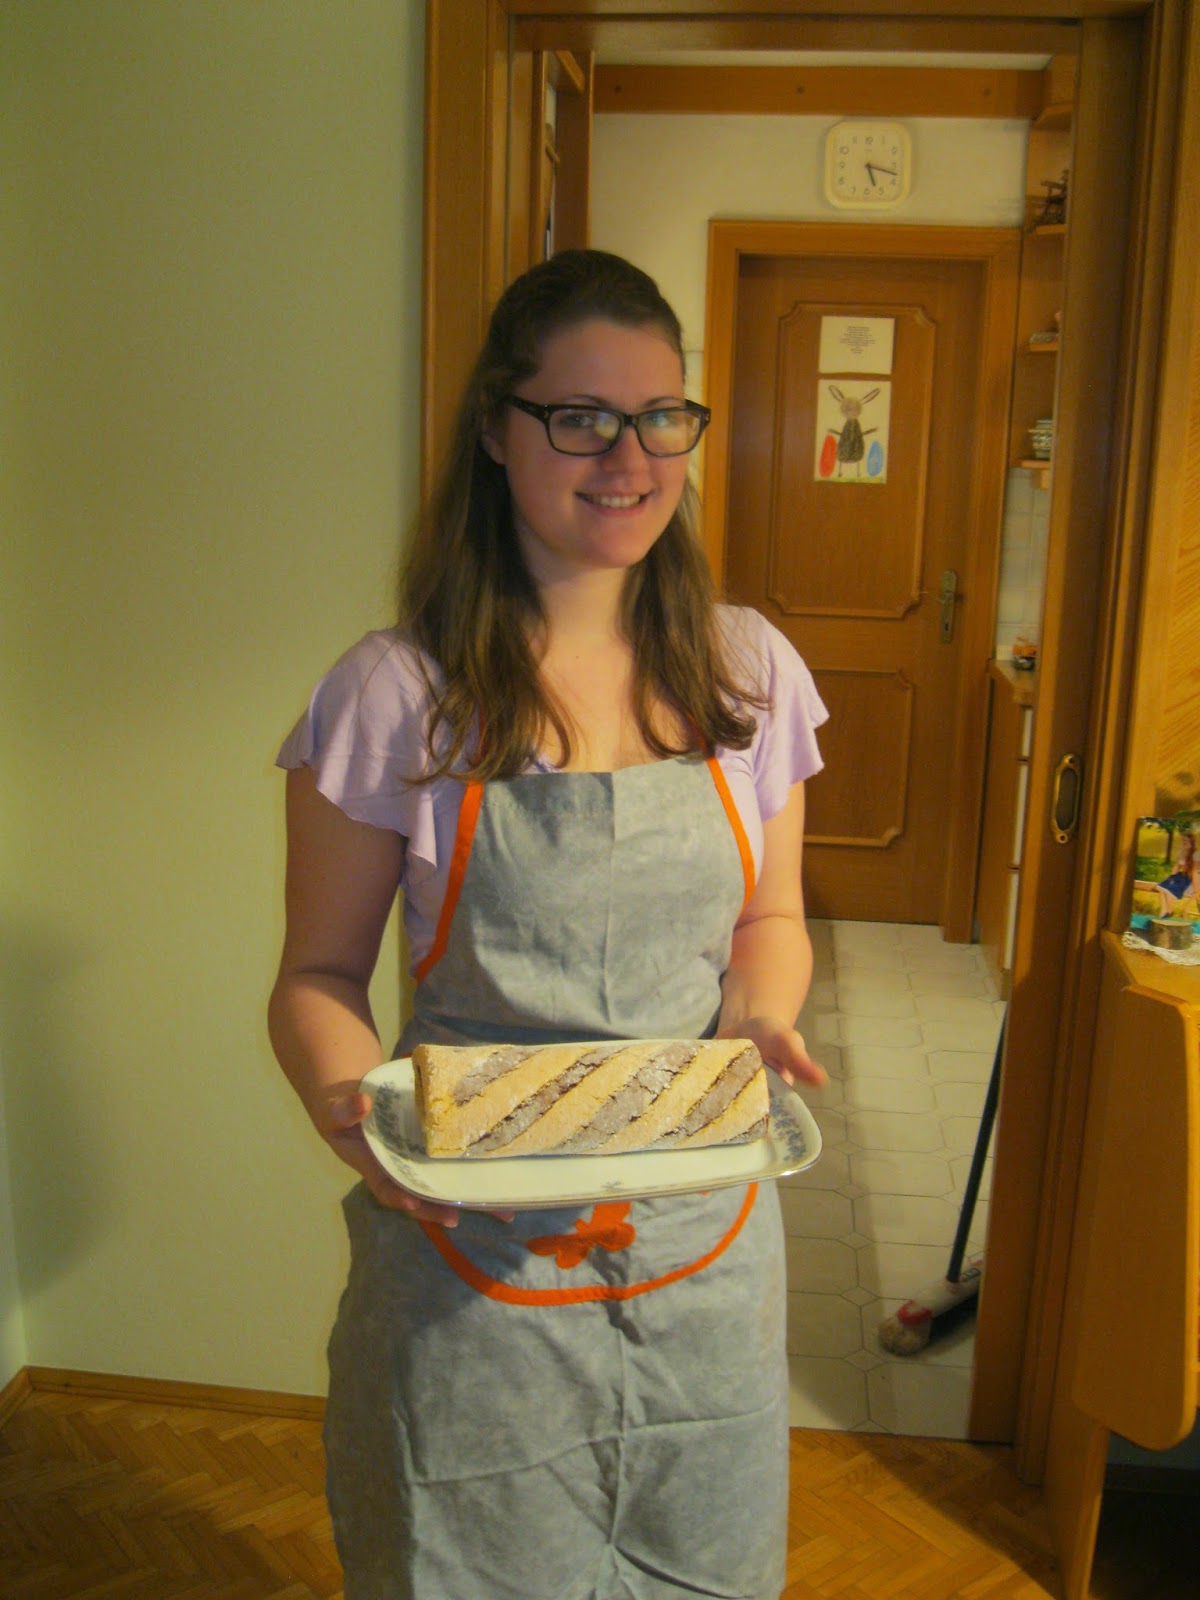
Now, the Vanilla-Chocolate-Swiss roll is ready to serve.  Enjoy!

Market excursions..


Follow me around..

Alright guys, today I want to share one of my most favourite places in Graz with you. The farmers market on Kaiser-Josef-Square. I really love that market, especially now in spring. The sweet scent of freshly cut flowers is always lingering in the air, while you can hear all different kind of people gossiping and laughing at ever corner in the morning sun light. This atmosphere simply makes me happy.

However the main reason I go there nearly every Wednesday morning is FOOD. I know it is a little bit more expensive than in the supermarket and as students we are living on a budget, but in my opinion nowadays you have to let quality outweigh quantity. Most of the time I’m not even sure WHAT I’m eating whenever I heat myself one of those microwave meals. Granted, it’s a cheap and convenient dish, but – as we all know – not good for your body.

Plus it is not only healthier and more sustainable to eat locally grown food, it also helps to build community in your city or neighborhood and instead of giving your money to large corporations, you get the opportunity to supporting local farmers and small business owners.

But let’s cut to the topic here: What can you get at a farmers market?


Kaiser-Josef-Market opens daily from Monday to Saturday from 6:00 am till 1:00 pm and is located opposite the opera house.


Nearly everything you can buy there is a product of organic farming. The offer is extremely diverse:

Fresh fruits and vegetables..


Different types of meat: bacon, beef, sausages, steak…

Raw, minced, salted and smoked..

Big varieties of cheese..


Rich, green lettuce..


Bread and pastries..


But also self-made jam and booze..


Along with a huge rage of traditional, Styrian products like horseradish, runner beans, mushrooms and of course pumpkin seed oil..


I also want to take this opportunity to show you my two stalls, which I visit frequently. The first is the whole-food shop, located at the very back of the market.   

It offers a great range of dried fruits ad nuts, but also vegan/vegetarian products..

My second favourite place is the juice stall. The owners of the little kiosk offer to make you fresh smoothies and juices. You can choose from various ingredients and create your own personal drink.


I hope I could whet your interest. So that next time you have some time on your hands, maybe you will check one of those places out and even buy some flowers in the process :)


Savory Seitan

I have quite a strange relationship with food. I do not only enjoy eating, preparing or buying food, I even like to only look at it. I just love the colours, the smell, the texture and of course the taste of different food items. On the other hand I also try to eat as healthy as possible in order to provide my body all nutrients and enough energy. Having tried many different diets and lifestyles together with the fact that I simply adore all kind of vegetables, made me end up as a vegetarian, but I tend to cook vegan meals if I prepare them for myself. This works best for me and my body, so that I feel the most energetic, dynamic and motivated I have ever felt in my entire life. One reason why this diet works so great for me is that I simply adore carrots, tomatoes, eggplants, celery,... and as well as starchy vegetables like rice, potatoes, bulgur, buckwheat and quinoa. However, sometimes I just like to add something with a bit more protein to my meals. Most people only think of tofu when it comes to vegan protein, but there are a lot more options, such as beans, lentils or seitan.
Sei...what?
Seitan! Seitan is made from pure wheat protein, better known as "gluten". It was traditionally used by Zen-Buddhists as a substitute for meat and therefore is a meal of Chinese and Japanese origin.
Attention!!! If you suffer from celiac disease or if your body has any other issue with digesting gluten, then you should not try this recipe!!!
There are basically two different ways to prepare seitan. The more common one is to buy whole wheat flour and rinse it with cold water until the water runs clear, so that only the gluten is left. This can be quite tricky, so I am going to show you the other option.

You will need:
- 250g of gluten
- 250ml of water
- 2 tsp. garlic powder
- 1.7 liter of vegetable broth
- 2 tsp. soy sauce
- approximately 100g of tomato paste
- ½ small onion, diced
- 1 clove garlic, crushed

At first, combine wheat gluten, salt and garlic powder in large bowl. 
Add water and the soy sauce and knead the mixture until a dough forms. You may need to add more water if necessary. 
Continue kneading the dough in the bowl until its consistence turns elastic.
Cut the dough into smaller pieces and place them in a large saucepan.

Now add the diced onion, the tomato paste, the garlic, and enough vegetable broth to cover the seitan. 
Bring everything to a boil over medium heat, before reducing the heat in order to let it simmer 30 to 45 minutes, until the seitan is firm.
Now remove everything from the heat. It is important to let the seitan cool down in the vegetable broth, as it soaks up the flavours over night. 
The seitan is now ready to be steamed, baked, fried or used in any dish that ordinarily requires meat. Feel free to play around with flavors and shapes!


Enjoy!

Tasty - tastier - sirnica


Dear all,

For our second post, we, Viktoria and Monika, decided to write about one of our favourite meals – “sirnica”, which is a traditional food in Croatia and other countries of former Yugoslavia.  It is similar to the Austrian apfelstrudel but it looks slightly different. The ingredients for the pastry are flour, water, oil and salt, for the filling, however, you can use nearly everything you want: from cheese (in Croatian sir that's why it's called sirnica), mince, pumpkin, potatoes, chard and apples, cherries or sour cherries.

To prepare the filling for the sirnica, you have to stir cottage cheese or curd, eggs, sour cream, salt, and pepper with a pinch of Vegeta. Vegeta is an all-purpose seasoning nearly every household in Croatia has in its kitchen. For my filling I used about 700 grammes cheese, two eggs and 500g sour cream but there is no harm if you use more                                                                                       or less of something.

This time, we decided to make the cheese for the pita ourselves because the cottage cheese from the supermarket dries out and gets hard, whereas, the homemade one stays soft and it tastes better. To prepare the cheese we boiled three litres of milk, then removed it from the heat and first stirred in yogurt and added then 3 tablespoons of vinegar essence. Shortly after, the milk turns into curds and whey. Curds are the solid parts and whey is the liquid one. Let it cool down and then pass the curds and whey through a cotton handkerchief and a draining spoon. Press the cheese to get most of the moisture out and leave it overnight in the fridge. In the morning unmold it from the draining spoon and the cheese is ready.

To make the pastry for the pita: Knead together about 
  • 500 g flour, 
  • 300 ml lukewarm water, 
  • 5 tablespoons oil and 
  • 1 teaspoon salt
until it gets smooth and elastic. Baste it with oil, put it in a plastic bowl and let it stand for about an hour.

Before you start with the cooking, we strongly recommend putting away your chairs and your carpet. Make sure you can get to the table from each side and cover it with a tablecloth. For the next steps look at this video linked below. We tried to explain it in words, but people who read through it, said they do not know what they would be supposed to do because some words do not exist in English (e.g. oklagija what means rolling pin but not the one you probably think of).


For us it was the first time to try this out without our mums giving us instructions. We have to admit that some accidents happened (We had to make the pastry twice because the first time we forgot to cover it with a plastic bowl). What is more, after preparing this meal for the first tame, you will surely get some sore muscles. We speak from personal experience. 

While cooking, we spoke English (of course) and we tried to translate some words like pita in English. After some time we came up with “leafy cheese-pie” but as we were not sure if this translation fits, we decided to leave pita. What do you think about this translation?

We wish you bon appétit, dobar tek and have fun =)

Food Diary - Hungary Edition

Hello everyone.

For the I speak food topic I decided to film a short video about some examples of the Hungarian cuisine. On Saturday, the beginning of easter break, I drove to Hungary with my dad. So, I thought it'd be interesting to film a few scenes of the landscape at the beginning and at the end of the video because many of you may haven't been to Hungary before. Now, back to the actual topic, food.

I chose to show you some dishes I really love - except the gulyás soup because I'm vegetarian. ;-) My granny helped to carry out my food diary plan; she prepared the gulyás soup and lángos. Of course, I didn't eat everything on my own. The rest I bought either at a supermarket or at food stalls.

How did I film this video?
Firstly,  I filmed the landscape scenes with my GoPro and the food scenes with my Samsung phone. Unfortunately, I don't own an appropriate camera yet. :-D Secondly, I edited everything on iMovie. Before then I had NO IDEA how editing and iMovie work. But luckily there are some useful tutorials online. And lastly, I did a complete voice-over.


I hope you enjoyed my short trip through the Hungarian cuisine. I wish you all an enjoyable break.

See you then,

Nicole

Russian Napoleon - let the baking begin!


Hey guys,

Me and my Ukrainian friend Nastja met - especially for this blog - to prepare the fantastic "Napoleon", a very popular 15-layer Russian  cake. Originally, it is a French pastry, but in Russian literature, a cake named Наполеон (Napoleon) is first mentioned as early as in the first half of the 19th century! As I experienced it during my semester in Russia, the cake is a must-have at all sorts of Party, no matter if in Family or with friends.

How to make Napoleon cake:

 
Dough ingredients: Margarine: 0,5 kg, Flour: 1kg, 1 egg, Vinegar: 1 spoon, Water: 150 ml (half a glass)

Cream ingredients: Milk: 1L, 4 eggs, a can of condensed milk, 0,5 kg of butter, half a cup of sugar, a pack of vanillin.

Making the dough

1)      Mix an egg, 150 ml of water and a tablespoonful of vinegar until smooth

2)      Pour 5 cups of flour on the table, then add 0,5 kg of softened margarine. (slightly heated or room temperature) Toss them together with your hands until smooth.

3)      Combine the mixtures from the cups, knead the dough and leave on the table for 20-30 min.

4)      Cut the dough into ten pieces.

5)      Roll out the dough pieces into the desired shape and bake them in the oven at a temperature of 220-250 degrees.

Cream:

1)      Heat 750 ml of milk until boiling.

2)      At the same time, whisk four eggs, half a glass of sugar and four cups of flour together in a separate cup. Stir until smooth, then add the remaining 250 ml of milk.

3)      Pour this mix into boiling milk while mixing quickly. (on low heat) You have to stir until it is brought to the boil again, then add a pack of vanillin, and leave it to get cold.

4)      Beat 0,5 kg of melted butter and condensed milk together with the mixer.

5)      Add the mix from the step three and beat it together.

Grease cake layers with cream. Press them together to adhere. After you assemble the cake, make a crumb coat on the sides and the top of the cake. Remove any loose crumbs from the top of the cake. Put it into Refrigerator.
 
Just try it - and you will get a little closer to Russian culture :). 
 

French Pizza (or “Tarte flambée“) – An Alsatian cooking experience by Shishi

When I fly to Paris, I usually make a stop in Vienna, crash by an old friend of mine called Leni and enjoy the city for a couple of days. We always cook together but this time, as she had to work on her bachelor thesis, I decided to kill two birds with one stone preparing a little motivating something for her and her flatmate and improving my English food vocabulary. I chose to make a “Tarte flambée” (only takes a few minutes ^^) and I tried to translate a recipe my grandmother once told me about.   

Ingredients (for 1 very hungry person or 2 people)

Dough:
~    250 g Flour
-          1 packet dry yeast
-          1 pinch of sugar
-          1 teaspoon of salt
-          Water

Topping:
~    2 cups of crème fraîche 
-          Salt
-          Pepper
-          Nutmeg (optional)

-          Grated cheese (optional)
-          Spinach (or bear's garlic)
-          Feta
-          Cherry tomatoes (or red and green pepper)
-     Actually everything you're in the mood for ;)

Preparation
-       Mix all the dough’s ingredients in a bowl and knead until obtaining a uniform ball. Let the ball rise at a hot spot approx. 20 - 30 min.
-          After this time, roll it very thin and place it on a backing sheet lined with parchment paper.
-          Season the crème fraîche with salt, pepper and nutmeg and coat the dough with the mixture.
-          Spread the grated cheese, the sliced tomatoes, the feta and the spinach on the dough.
-          Bake for around 10/12 minutes in the preheated oven 220-250°C at hot air.


And..... That's the result!! :)


It's quite easy to prepare it, so I hope you'll try it once. Enjoy!!!


Polish Kopytka


The polish potato dumplings I´m going to make today are called Kopytka (pronunciation: kowpitkar) which apparently means little hoofs (I didn´t know that until today. I thought they looked like pillows). Most of you know the Italian Gnocchi better, but once you tried these you never want anything else anymore. And I might say that because my grandmother gave me this family recipe, but it is a lot simpler and better than it´s Italian “brother” too.

F.y.i. I´m going to cook for 2 people today :D

Ingredients


  •  600g (21oz) potatoes
    • 1 egg
  • 150g (1 ¼ cups) flour plus a hand full for the kitchen mat
  • a pinch of salt
  • 3 tablespoons vegetable oil
  • 1 onion, minced


Utensils


  • a vegetable peeler
  • two pots
  • a colander
  • a potato masher
  • a pastry board
  • a butter knife
  • a skimmer
  • a cutting board
  • a knife
  • a pan
  • a plate


How to cook Kopytka? 


Step one: Wash your hands ;)

Step two: Boil water in a pot and add a pinch of salt.

Step three: Peel potatoes and cook until they are tender. It depends on the potatoes and your stove, but it takes around 15 minutes.

Step four: Drain the potatoes thru a colander and mash them until there are no lumps.

Step five: Scatter a hand full of flour on the pastry board and place the mashed potatoes on top of it. Wait until the mashed potatoes have reached room temperature.

Step six: Mold a well in the middle so that the cracked egg and flour don´t leak out.

Step seven: Knead the dough while adding the flour little by little until all the ingredients are combined. Only add flour when it´s needed even though it is sticky because this is what makes the Kopytka so fluffy.


Step eight: Boil water in a large pot and add a pinch of salt. Slightly roll out the dough so it looks like a snake and is as thick as your thumb. Cut it diagonally into little hoofs (or pillows). 


 Step nine: Drop the Kopytka in the water and wait another 2- 3 minutes from the moment until they float on the surface. Use your skimmer to get them out and put them on a plate until you cooked all of the dumplings.

Step ten: Repeat step eight and nine until you finished the dough. Chop the onion very finely. Heat a pan and add the vegetable oil and minced onion. Roast the Kopytka in the pan and serve.


Enjoy your meal! Smacznego!


P.s.: Maybe you can find someone else who is willing to clean the kitchen ;D